Sometimes we need tables to post data in a nice layout of columns and rows but there is no table feature in the post editor of WordPress as of now. Surely there are numerous plugins available to post tables easily but you need to download and install one to make it work plus you need to make sure the plugin is compatible with the latest version of WordPress.
When there is a new update, the plugin may cause errors and even worst case scenarios like causing your WordPress website to be blank all of a sudden because it does not suit the new update.
Don’t you worry because you can still insert and put tables inside your WordPress post without using a plugin. It is done easily and simple. Read the steps below.
Advantages of adding tables without a Plugin
- No need to download Plugin
- No need to check WordPress update compatability every now and then
- No database errors
- The lesser the plugins installed in your WP, the better for your website to load faster. Remember, loading time is important to search engines.
How to Create Tables in WordPress Post
- Go to your WordPress and create a new Post or Page.
- Copy the code below and change the info (in red) you want to put in your tables.
- On your Post or PageVisual Editor, switch to HTML and paste your code.
- Check your Preview. BTW, you can adjust the width and length of rows and columns boxes by dragging the edit cursor just like when you edit a box in Microsoft Word and Excel.
- Hit Publish when you are done.
<table style=”text-align: center; height: 152px;” border=”1″ cellspacing=”0″ cellpadding=”0″ width=”390″>
<tbody>
<tr style=”background-color: #e9e9e9; font-weight:bolder;”><td>Title 1 </td>
<td>Title 2</td>
<td>Title 3</td>
<td>Title 4</td>
</tr><tr>
<td>Detail One</td>
<td>Detail Two</td>
<td>Detail Three</td>
<td>Detail Four</td></tr>
<tr>
<td>Detail One A</td>
<td>Detail Two A</td>
<td>Detail Three A</td>
<td>Detail Four A</td></tr>
</tbody>
</table>
Take note you can add another columns by adding the format:
<td>Your Info</td>
Add another rows by adding the format:
<tr>
<td>Detail One</td>
<td>Detail Two</td>
<td>Detail Three</td>
<td>Detail Four</td></tr>
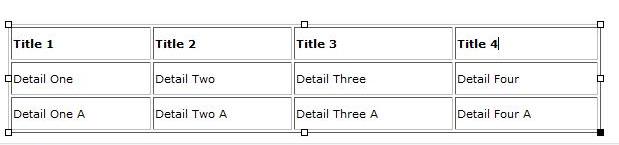
The above code will result to this table below:
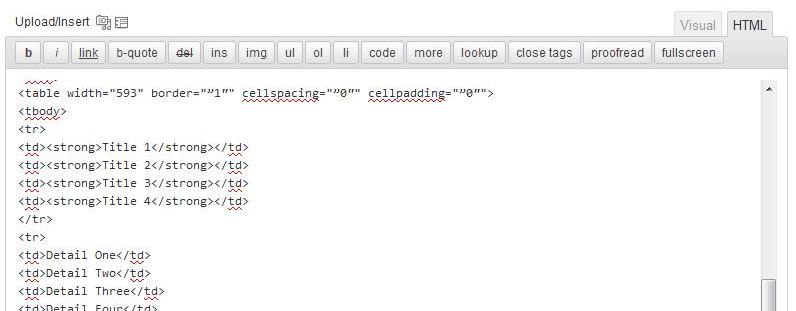
This is a sample code inside the HTML Editor of WordPress:
So easy right? If you have questions, feel free to post them by commenting. Thank you!