W3 Total Cache is one of the best caching WordPress plugins out there and we know many top websites and famous bloggers use it too. It’s proven effective in improving pagespeed and making a website load faster. There are many bloggers who install W3 TC plugin but end up crashing their site so they decide to deactivate it instead. In this page, I am sharing the correct settings for WordPress users. Take note, I use this exact settings here at Philpad and they are the same settings recommended by my awesome hosting provider – Web Synthesis.
These W3 Total cache settings are also recommended for shared hosting accounts though I will share here the settings I use for my website which is under a VPS Managed Hosting. These settings are also safe for Adsense since Minify Cache is disabled.

The General Settings are: Enable only Page Cache and Browser Cache. That is actually the best settings for shared hosting too since you only have limited control across your account. Even Hostgator recommends disable Object Cache and Database Cache. Anyway, you don’t have to worry about enabling only Page and Browser cache and leaving Minify untouched since minification has only little effect on page load time. Minify settings often cause theme incompatibility and some errors. It’s not also a big deal to touch Object Cache and Database Cache unless you want things to be complicated that your server can’t pretty much handle. Ok, we go on the settings now.
W3 Total Cache Safe Settings
The screenshots below are from W3 Total Cache update settings used in my site. I’m using the latest version of WordPress.
General Settings:
- Page Cache: Enable (checked)
- Page cache Method: Disk Basic (others usually use Disk Enhanced)
Ask your hosting provider what page cache method you must use. Hostgator and some other shared hosting users are required to use Disk Enhanced)
- Leave Minify, Object and Database cache settings disabled.
- Browser Cache: Enable (checked)
This will enable HTTP compression and add headers to reduce server load and decrease file load time so when you browse your site, it’ll gonna be faster.
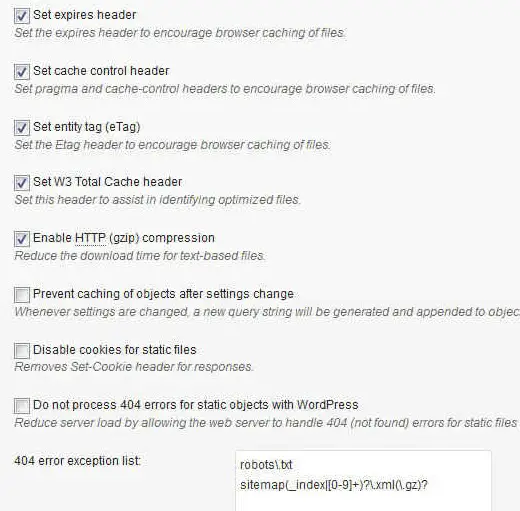
Page cache settings are seen in this screenshot.
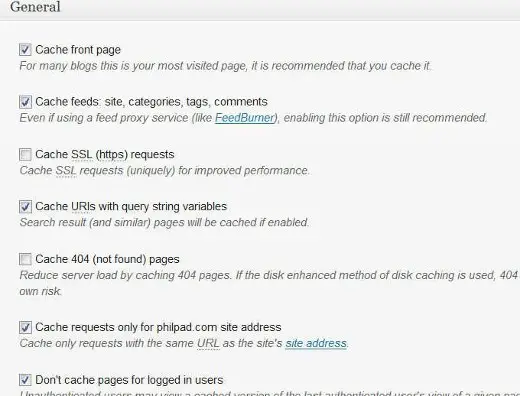
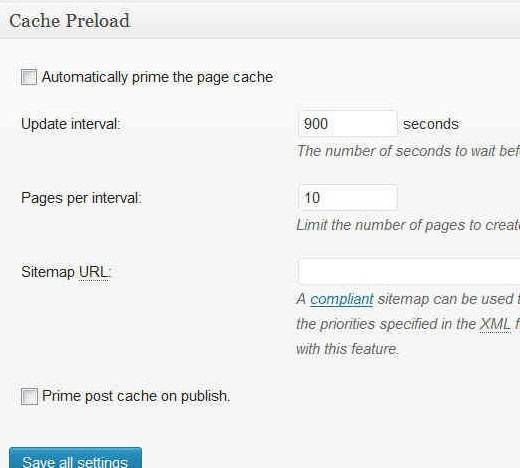
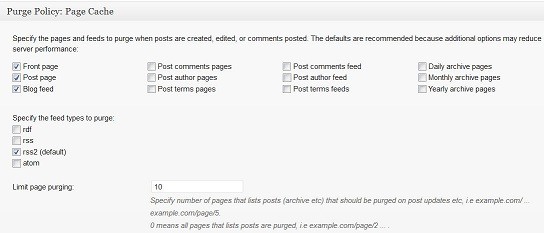
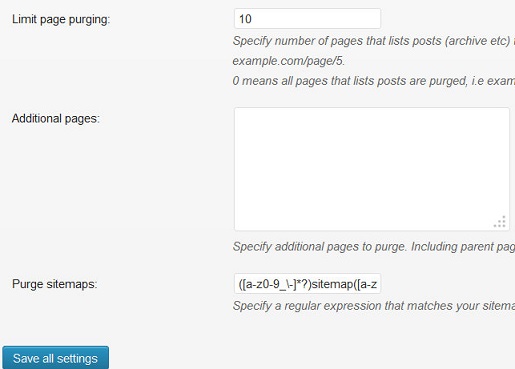
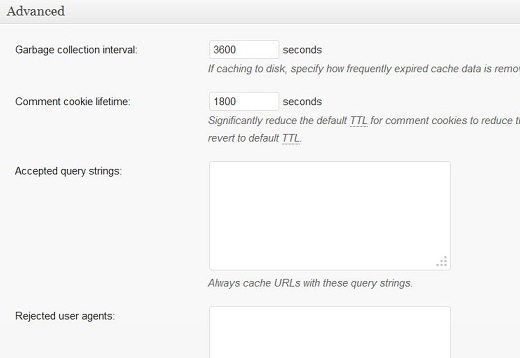
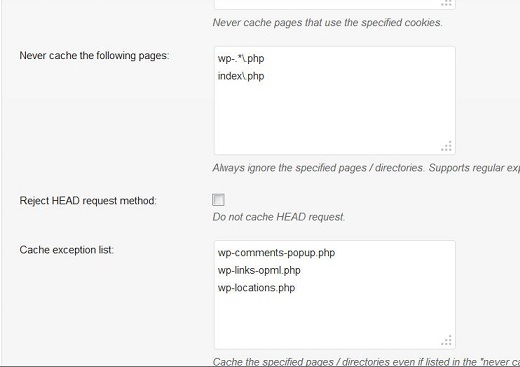
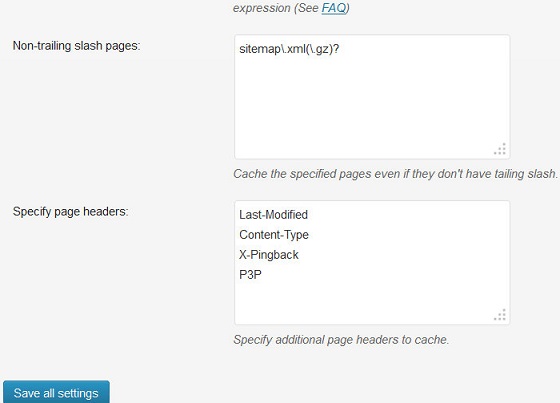
General settings for Browser cache are seen in this screenshot.
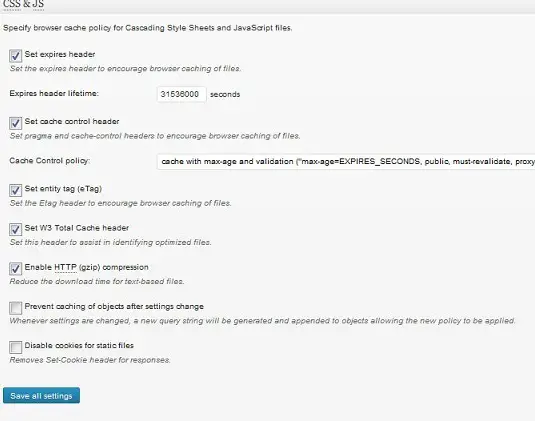
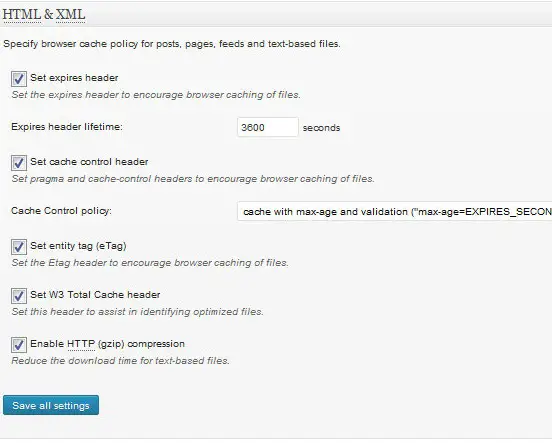
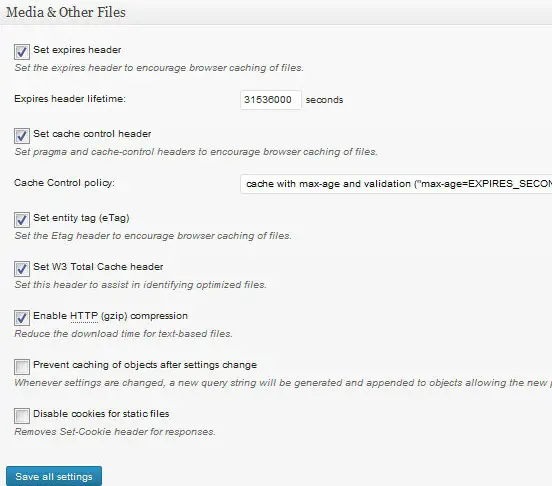
Save all settings. You may want to disable Preview mode at this time. You’re done. So easy right?
You should check your site now and check a page or a post. You’ll see something about W3 Total Cache when you view your page source at the bottom. That means, your cache is now working. Congrats!
How to Use W3 Total Cache and Avoid WordPress Errors
Now that you have installed the best caching plugin, there are no usual errors to encounter even if you make a new post or a page. But it is important to back up your database and files before you make an update especially new WordPress update. I recommend backing up and deactivating W3 Total Cache first before updating WordPress then reactivating it again. See the steps below before you update WordPress:
- Back up database and files
- Save your W3 Total Cache settings (download your own settings by going on the General tab and download settings at the bottom)
- Deactivate W3 Total Cache
- Update the new version of WordPress
- Reactivate W3 Total Cache and save the settings you have downloaded
- Empty and clear all caches
- Wait for 24-48 hours for all your cache to build
That’s it. You’re done and you can expect a fast WordPress website again.
